.png)
.jpg)
7 Proven Solutions to the Most Common Axial Fan Issues You’ll Encounter — 7 Checkpoints to Quickly Identify the Cause
7 Proven Solutions to the Most Common Axial Fan Issues You’ll Encounter — 7 Checkpoints to Quickly Identify the Cause
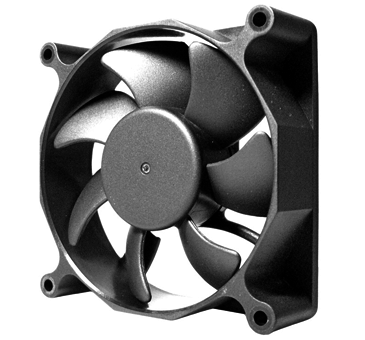
Axial fans are essential components in ventilation, cooling, and exhaust systems across homes, offices, and industrial facilities. They’re designed to deliver reliable airflow and efficient performance with minimal maintenance.
However, even the most durable fans can develop problems over time — from weak airflow and unusual noise to complete motor failure.
This comprehensive troubleshooting guide walks you through seven proven solutions that address the most frequent axial fan issues. Each section includes step-by-step actions, professional tips, and maintenance advice to help you restore your fan’s performance safely and effectively.
1. Check the Power Supply and Plug: The First Step in Solving Axial Fan Problems
If your axial fan won’t start or suddenly stops working, the problem might not be as serious as it seems. Many users immediately assume their fan motor has failed, but in most cases, the issue lies in something simple — a faulty power supply, loose plug, or damaged cord.
✅ Step-by-Step Troubleshooting:
- Unplug and replug the fan to make sure the connection is firm.
- Test the power outlet with another appliance, such as a lamp or phone charger.
- Inspect the plug and power cord for visible wear, cracks, or burns.
- If you’re using an extension cord, try plugging the fan directly into the wall.
Sometimes, power interruptions or voltage drops can cause fans to stop intermittently. For large industrial fans, always use a dedicated power circuit to ensure consistent voltage.
💡 Pro Tip:
Some modern fans include a thermal fuse that cuts power when overheating occurs to protect internal components. Wait 10–15 minutes for it to cool down, then restart the fan. If it runs again, overheating was the likely cause.
If the problem persists even after checking power, it’s worth testing the internal fuse or capacitor (best done by a technician).
2. Inspect the Fan Blades for Dust, Damage, or Imbalance
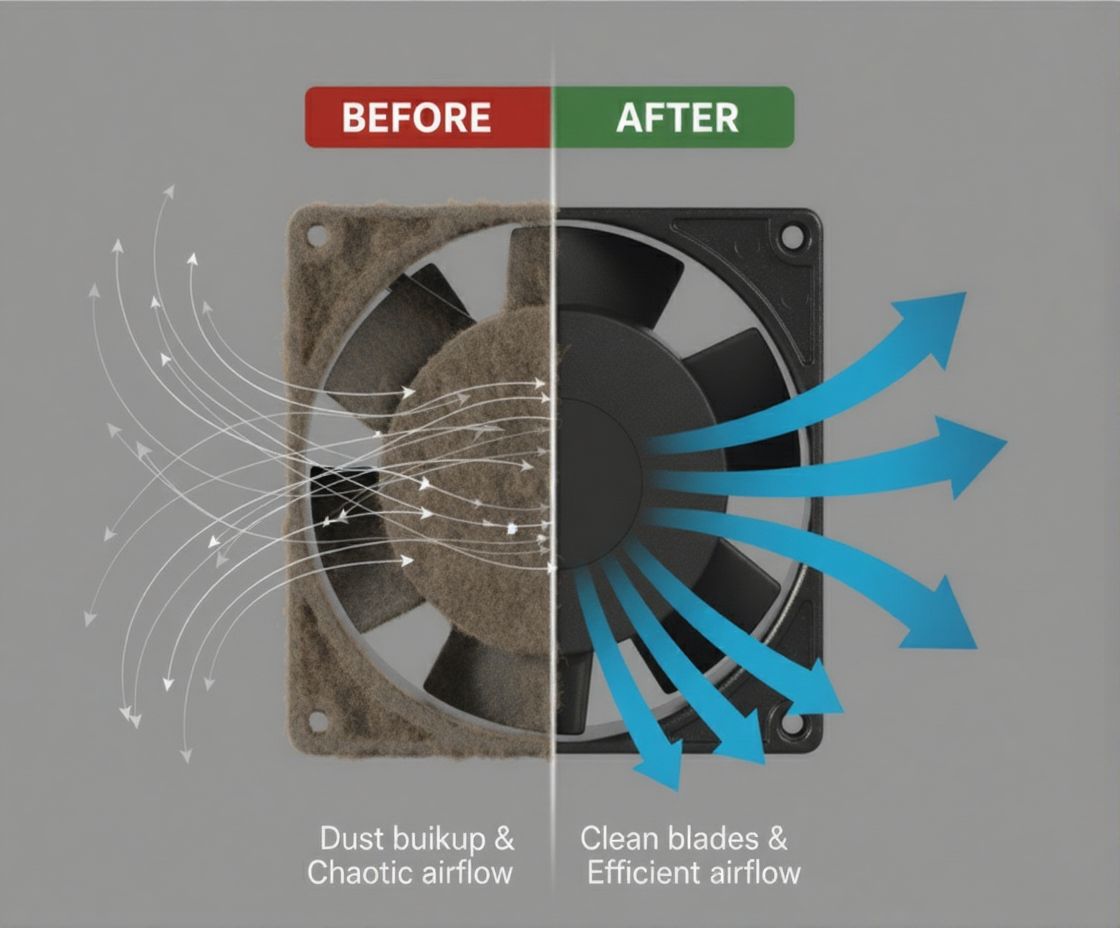
Over time, fan blades accumulate dust and debris that can create imbalance and vibration. When one side of the fan becomes heavier due to buildup, it causes uneven rotation — leading to rattling sounds and reduced airflow.
Dirty or damaged blades not only make the fan noisier but also force the motor to work harder, shortening its lifespan.
✅ How to Check:
- Unplug the fan and remove the protective grille.
- Wipe each blade carefully using a soft, damp cloth or mild detergent solution.
- Inspect the blades for cracks, dents, or bent edges that could disturb airflow.
- Ensure all blades are tightly secured to the hub or rotor.
After cleaning, run the fan again to check for improvements. A smooth, steady hum means the balance is restored.
💡 Why It Matters:
Balanced blades help maintain consistent airflow, reduce noise levels, and minimize vibration stress on bearings and the motor.
Regular cleaning every few months can also prevent energy loss — since dust buildup can reduce airflow efficiency by up to 20–30%.
3. Examine the Motor for Overheating or Burnout Signs
The motor is the heart of your axial fan and keeping it cool is vital to ensure continuous operation. Overheating is one of the most common motor issues, often caused by dust accumulation, blocked ventilation holes, or worn bearings that increase friction.
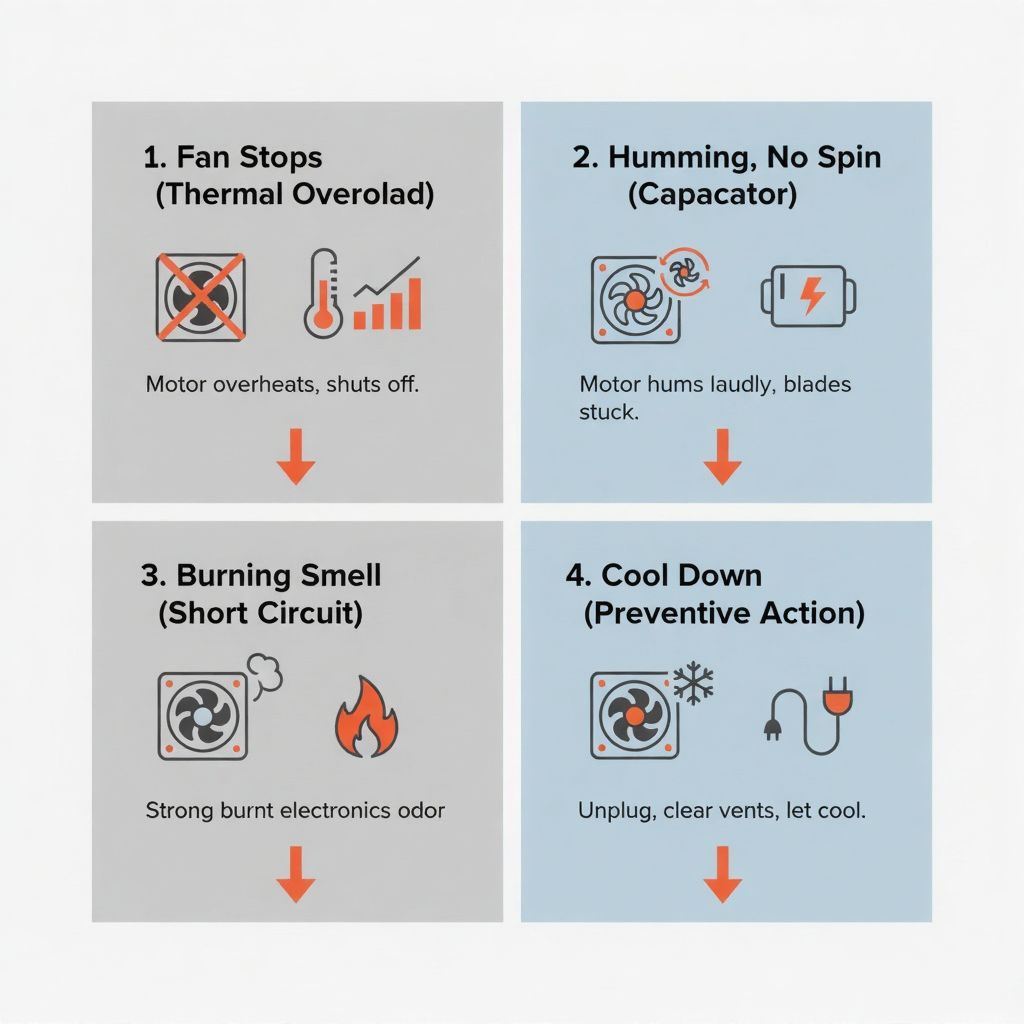
✅ What to Look For:
- The fan starts but stops after a few minutes → thermal overload protection.
- The fan hums but does not spin → possible motor capacitor failure.
- You smell burning plastic → internal wiring insulation may be melting.
✅ Quick Actions:
- Turn off the fan and allow it to cool for 15–20 minutes.
- Make sure the air vents around the motor are free from dust and debris.
- If the motor overheats again, it’s time to call a professional technician.
💡 Safety Note:
Never pour oil or water into the motor casing. If your fan requires lubrication, use motor-grade oil and follow the manufacturer’s recommendations. Incorrect lubrication can trap dust and damage internal components.
If the motor emits smoke or sparks, disconnect it immediately. Continuing to operate an overheated motor could lead to electrical hazards or permanent burnout.
4. Evaluate Airflow Blockages and Dirty Grilles That Reduce Performance
Weak airflow doesn’t always indicate a serious problem. In most cases, it’s caused by simple blockages or dirty grilles that restrict air circulation. Even a thin layer of dust can significantly reduce air volume output.
✅ How to Restore Airflow:
- Remove both front and rear grilles and clean them with a soft brush or vacuum cleaner.
- Check for objects — boxes, curtains, or walls — placed too close to the fan.
- Make sure there’s enough clearance around the fan’s intake and exhaust sides.
- Verify that the fan’s rotation direction is correct (reversed wiring can reduce efficiency).
💡 Pro Tip:
For industrial fans or high-pressure ventilation systems, a partially blocked grille can cut performance by nearly 30%. Routine cleaning not only restores airflow but also prevents overheating and reduces power consumption.
If you notice that airflow remains weak after cleaning, consider checking the fan’s capacitor or motor speed settings. Sometimes, older capacitors lose efficiency and can’t maintain full rotational speed.
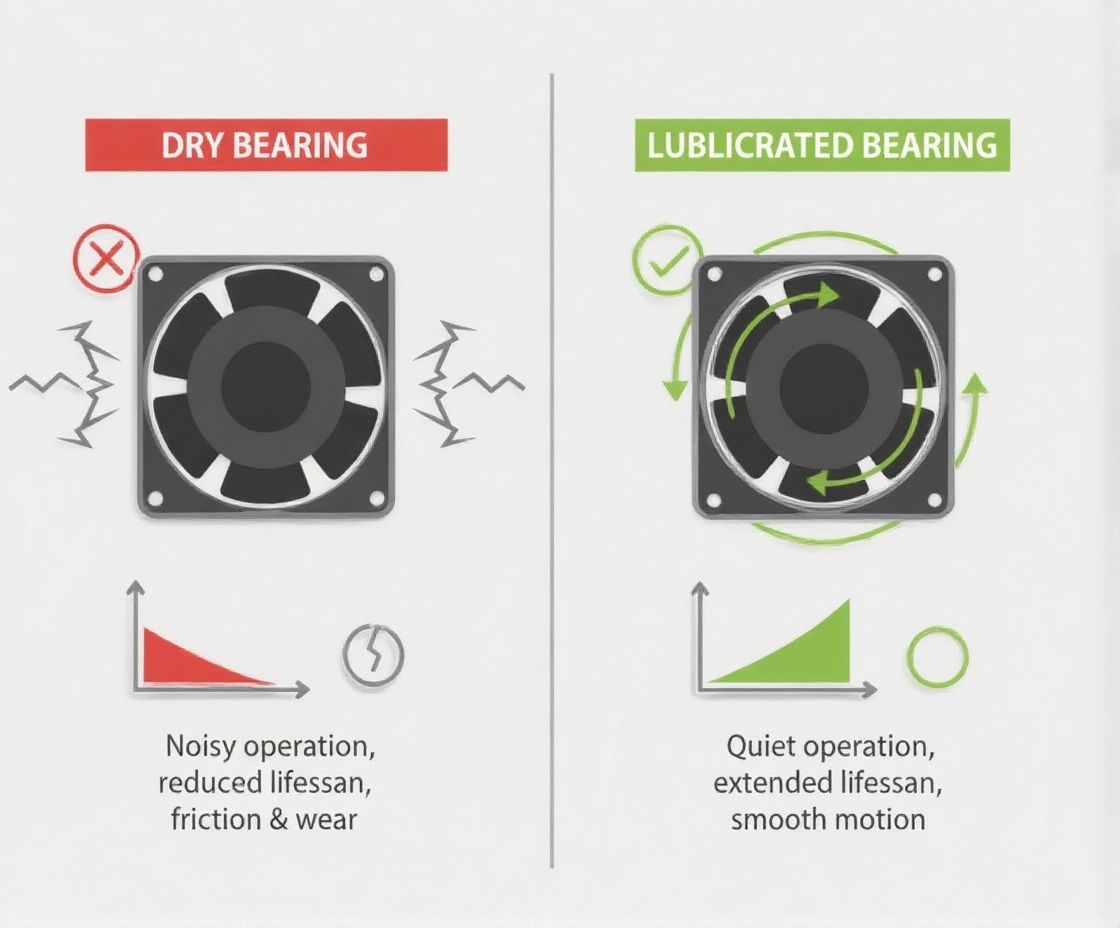
5. Check the Bearings and Lubrication for Smooth Rotation
When your fan starts making a grinding, squealing, or squeaking noise, it’s often not the blades — it’s the bearings. Bearings help the fan shaft rotate smoothly. Over time, friction, dust, or lack of lubrication can cause them to wear down.
✅ Quick Fix:
- Unplug the fan and manually spin the blades.
- If they rotate freely, the bearings are in good condition.
- If you feel resistance or hear scraping sounds, lubrication is needed.
- Apply a few drops of light machine oil or sewing machine oil to the shaft (refer to your manual).
- Avoid thick grease or heavy oil — these attract dust and may damage the bearing seals.
💡 Why It’s Important:
Smooth bearings reduce stress on the motor, lower energy use, and help maintain silent operation. A fan with well-lubricated bearings typically lasts twice as long as one without proper maintenance.
If lubrication doesn’t solve the problem, the bearings might be worn out and need replacement — a simple, low-cost repair compared to replacing the entire motor.
6. Ensure Correct Installation and Secure Mounting for Stable Operation
Fans that vibrate or make rattling noises might not be damaged — they could just be improperly mounted. Poor installation is one of the most overlooked causes of noise and instability in both wall-mounted and ceiling fans.
✅ What to Inspect:
- Check that all mounting brackets and screws are tight.
- Verify that the fan is evenly balanced and not tilted to one side.
- For heavy-duty fans, use rubber pads or anti-vibration mounts to absorb shock.
- Inspect nearby surfaces — sometimes vibration travels through walls or ducts.
💡 Pro Tip:
Even a 3–5° tilt can lead to uneven air pressure and mechanical strain, causing premature wear on bearings and brackets. A properly leveled fan runs more quietly and safely.
If you’ve recently installed a fan, recheck its mounting after the first week of operation — bolts can loosen slightly due to vibration during initial use.
7. Test the Fan’s Speed Controller and Electrical Connections for Faults
When the fan doesn’t respond to speed adjustments or suddenly stops, the issue might lie in the speed regulator or electrical wiring.
✅ Troubleshooting Checklist:
- Check if the speed control knob feels loose, jammed, or unresponsive.
- Unplug the fan and open the control box to look for burn marks or loose wires.
- Replace damaged regulators or fuses with original, compatible parts.
💡 Safety Reminder:
Avoid attempting internal wiring repairs unless you’re qualified. Incorrect wiring can lead to electrical shocks or damage to the motor. Always consult a licensed technician if you’re unsure.
For industrial environments, periodic electrical safety inspections are essential. Dust and humidity can corrode connectors, causing intermittent failures.
Quick Summary Table — 7 Checkpoints for Axial Fan Troubleshooting
|
Checkpoint |
Possible Problem |
Recommended Solution |
|
Power Supply |
Fan won’t start |
Check outlet, plug, and fuse |
|
Fan Blades |
Noise or imbalance |
Clean, tighten, or replace blades |
|
Motor |
Overheating or burnout |
Cool down, clean vents, inspect capacitor |
|
Airflow |
Weak or uneven |
Clean grilles, remove obstructions |
|
Bearings |
Grinding noise |
Lubricate bearings, remove dust |
|
Installation |
Vibration or movement |
Tighten mounts, realign fan |
|
Controller |
Speed malfunction |
Replace or repair regulator |
This table summarizes the most frequent problems and their quick solutions. Use it as your go-to maintenance checklist for any axial fan troubleshooting.
When to Contact a Professional
If your fan continues to malfunction after basic troubleshooting, there may be deeper issues within the motor wiring, PCB board, or internal capacitors. Do not attempt complex electrical repairs unless you have experience with fan motors.
Contact a certified technician if you observe:
- Persistent overheating or electrical burning smell.
- Sparks or smoke from the motor housing.
- Repeated tripping of circuit breakers.
Professional inspection ensures your safety and helps prevent costly motor replacements later. Regular maintenance by experts can also improve energy efficiency and reduce operational downtime.
Benefits of Regular Axial Fan Maintenance
A well-maintained axial fan doesn’t just last longer — it also performs better, consumes less energy, and operates more quietly. Here’s what regular upkeep offers:
- Longer Lifespan: Prevents early motor burnout and mechanical fatigue.
- Better Performance: Ensures consistent, high-efficiency airflow.
- Lower Noise Levels: Eliminates vibration and bearing friction.
- Energy Savings: Clean, lubricated fans use less power to move the same air volume.
- Improved Safety: Reduces overheating and electrical risk.
- Peace of Mind: Reliable cooling with fewer unexpected breakdowns.
Routine inspections every 3–6 months can significantly reduce downtime in industrial applications — especially in environments like warehouses, kitchens, and workshops where fans run continuously.
Expert Tip from Our Technicians
Our technicians at Liang Herng Elec. Mach Co., Ltd., the manufacturer behind SHYUAN YA Industrial Fans, recommend following a preventive maintenance schedule tailored to your usage environment:
- Household use: Clean every 3–6 months.
- Commercial kitchens or dusty areas: Clean monthly to prevent grease and dust buildup.
- Industrial settings: Perform a detailed check every quarter, including bearing lubrication and wiring inspection.
💡 Regular maintenance can reduce repair calls by up to 40%, saving both cost and downtime.
FAQs — Common Axial Fan Questions
Q1: Why is my axial fan making a rattling noise?
It’s often due to loose screws, unbalanced blades, or dust buildup. Tighten screws and clean blades for smoother operation.
Q2: What should I do if the fan doesn’t start at all?
Check the plug, outlet, and fuse first. If these are fine, the issue may be a burnt capacitor or faulty motor winding.
Q3: Can I lubricate the fan motor myself?
Yes, if your fan model allows it. Use only light machine oil and avoid over-lubrication.
Q4: How often should I clean my axial fan?
Every 3–6 months for home use, and more frequently for dusty industrial environments.
Q5: My fan turns on but airflow feels weak — why?
Dirty grilles, obstructions, or reversed fan rotation can cause weak airflow. Clean the housing and check airflow direction.
Q6: Is it safe to disassemble the fan?
Basic cleaning is fine, but for wiring or motor access, contact a professional to avoid electric shock.
Q7: What are signs my fan needs replacing?
Persistent overheating, grinding sounds, or reduced speed even after cleaning usually mean it’s time for a replacement.
Conclusion: Keep Your Axial Fan Running Smoothly with Simple Routine Care.
Axial fans are engineered for durability and efficiency, but regular maintenance ensures they continue performing at their best.
By following these seven checkpoints, you can diagnose problems early, extend the fan’s lifespan, and maintain stable airflow without costly repairs.
Whether you’re managing ventilation in an industrial facility or maintaining a simple cooling setup at home, these steps help you achieve quiet, efficient, and long-lasting performance.
■ Need Reliable Industrial Axial or Centrifugal Fans?
Explore our full range of AC and DC Axial Fans, Centrifugal Fans, and custom OEM/ODM cooling solutions on our official website:
👉 Visit www.coolingfanmanufacturers.com
Discover premium, Taiwan-made fans built with precision, certified by UL, CUL, CE, and RoHS — designed for high performance, durability, and low noise operation.
Whether you need standard models or customized solutions for ventilation, exhaust, or machinery cooling— we have the expertise to deliver the right product for your needs.
_top.jpg)
_top.jpg)
_top.jpg)

_top.jpg)
_top.jpg)
_top.jpg)