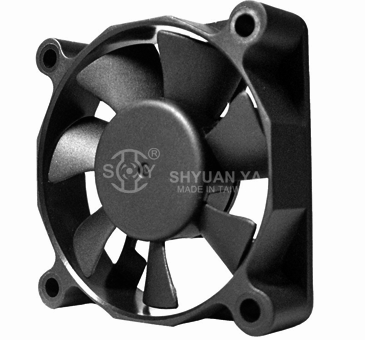
How Do I Install DC Axial Fans for Optimal Performance?
Proper installation of DC axial fans is essential to achieve maximum airflow, minimize noise, and extend the service life of both the fan and the equipment it cools. Even the highest-quality fan cannot perform at its best if mounted incorrectly or placed in a poorly designed airflow path.
Below are expert recommendations for achieving an optimal installation:
1. Align Airflow Direction Correctly
Every DC axial fan has two distinct sides:
- Inlet (Intake Side): Where air enters the fan.
- Outlet (Exhaust Side): Where air exits the fan.
Best Practice:
- Always align the inlet and exhaust sides with open, unobstructed flow paths.
- Position the fan to pull cool air in or push warm air out, depending on your system’s thermal strategy.
- Most fans include airflow arrows on the housing for easy orientation during installation.
2. Minimize Noise with Vibration Control
Operational noise can be amplified if the fan transfers vibration to the equipment housing.
Solutions:
- Use rubber grommets, vibration-dampening mounts, or isolation pads between the fan and the mounting surface.
- Avoid rigid mounting methods that may increase resonance and acoustic levels.
- Choose ball bearing fans for high-vibration environments, as they handle mechanical stress better than sleeve bearing fans.
3. Ensure Unobstructed Airflow
Blocked airflow drastically reduces cooling efficiency.
Checklist:
- Keep the area around the fan’s intake and exhaust free of obstructions such as wiring bundles, structural parts, or filters.
- Route cabling neatly along enclosure edges using cable ties or wire management systems.
- Maintain adequate clearance space (typically 10–20 mm) for unrestricted airflow.
4. Verify Mounting Hole Compatibility
Most DC axial fans are built with standardized mounting hole patterns for easy integration.
Best Practice:
- Confirm that the hole pattern and screw size match the fan’s specifications before installation.
- Avoid over-tightening screws, which can warp the housing or damage the fan frame.
5. Confirm Electrical Polarity and Voltage
Incorrect wiring is one of the most common causes of fan startup issues or damage.
Guidelines:
- Check the input voltage rating (e.g., 12V, 24V, or 48V DC) and ensure your power supply matches.
- Verify polarity using the manufacturer’s wiring diagram.
- Red = Positive (+)
- Black = Negative (-)
- Yellow or Blue = Tachometer or PWM signal (if equipped)
- Always test the fan after wiring before finalizing the installation.
6. Optimize Placement for System Cooling
Fan placement plays a major role in cooling performance. Consider these strategies:
- Negative Pressure Zones:
- Position fans to exhaust hot air out of the enclosure, allowing cooler outside air to be naturally drawn in.
- Closed-Loop Airflow Channels:
- For high-performance cooling, use a dedicated airflow pathway with intake and exhaust fans working together for maximum efficiency.
- Thermal Zoning:
- Place fans near heat-generating components like processors, transformers, or power supplies for direct spot cooling.
7. Perform a Final Functional Check
Before putting the system into full operation:
- Verify that the fan runs smoothly and quietly.
- Check for unusual noise or vibration, which may indicate misalignment or obstruction.
- Confirm that the fan meets the expected RPM if a tachometer signal is available.
- Ensure airflow direction matches your system’s cooling design.
Why Proper Installation Matters
A poorly installed fan can lead to:
- Reduced cooling efficiency and higher component temperatures
- Increased noise and vibration levels
- Shortened fan lifespan due to unnecessary mechanical stress
- Risk of system failure or thermal shutdown
Proper installation ensures reliable, quiet, and efficient cooling — protecting both your fan and your equipment investment.
Get Installation Support and Custom Guidance
Every application has unique cooling challenges, and our engineering team is here to help. We can provide:
- Installation guides and wiring diagrams
- Recommendations for optimal fan placement
- Custom mounting solutions for specialized enclosures
👉Contact us today to request a technical consultation or detailed installation guide to ensure your DC axial fans deliver maximum performance from day one.


.png)
.jpg)
